A guide to living in harmony with the land.
Malcolm Gladwell said in his book “Outliers” that is takes 10,000 hours of practice to become an expert in something. Now while this has been argued as an oversimplification, the point is clear: you don’t become a master in something over night.
What I’ve learned so far
Raised planter beds are not enough to keep iguanas from eating everything down to the nub.
Leg covers cannot keep them from climbing.
So next up, we had to build an enclosure.
As mentioned in my previous post, ideally I’d want the enclosure to look cute and be made of wood but I didn’t know if this would work or if the iguanas would still find a way, so I decided to make a prototype out of PVC pipe and hardwire cloth.
The Materials
So my planters frame size is 4 feet long by 2 feet wide. I wanted to have another 3 feet high to start.
The materials I used were:
- 1/2” PVC pipe
- PVC cutters
- 1/2” PVC elbows
- PVC primer and glue
- 1/4” hardwire cloth
- wire cutters
- outdoor-grade zip-ties
I started by building the short end’s arch first. 2 feet across by “3 feet higher than the planter” which actually means the PVC goes all the way to the ground, and stretches up 3 feet higher than the planter box (picture shown further down).
Putting it all together
I measured the PVC and cut using the PVC pipe cutters, which was so easy. I don’t know if you have to cut them straight since you end up just glueing the PVC elbows on to it, but I painstakingly cut them as straight as possible anyway.
I used a table to keep the frame flat when I glued the elbows on. The glue dries almost immediately, and you have to be very careful not to get the purple primer or the glue on your skin as it will stain. It goes away after a day or so, but still try to be careful.
I unrolled the hardwire cloth, very slowly to avoid slicing my skin open with the sharp metal edges. Be extra extra careful in this step.
Then I laid out the hardwire cloth, placed my newly-made arch frame on top of it and started securing the edges of the frame with the zip-ties. I used the wire cutters to remove the excess hardwire cloth. This by far took the longest amount of time as the 1/4” hardwire cloth had a lot of pieces to cut.
This is where my “just do it” idea comes into play.
Since the PVC “legs” run all the way to the ground, I extended the hardwire cloth passed the planter box and left it as is. I didn’t use another piece of PVC across the bottom since the hardwire cloth kind of bent inward. I could’ve used a T here but I honestly didn’t find it necessary.
This extended-leg design satisfied my concern about needing the extra vertical room. I could just lift up the enclosure and secure it higher, so I thought.
Once the sides were connected to the top, I had to make a decision on the doors, and how to actually access the plants. On one side, we went with double doors. On the other side, we tried one door that hinged at the top and would fold over the top of the frame. Since this is the ~prototype~ enclosure, I wanted to try two different door styles to see which one works better during the season.
A little hiccup
I should have added a little buffer to my measurements because when I went to add on the doors, they wouldn’t close flush.
My measurements didn’t account for the corner pieces of the planter itself that juts out just a tad. I let myself be annoyed for a minute and then I took a breath and decided to make the doors fit in line with the planter, instead of having them be the same length as the extended smaller sides – as you can see in the picture below.
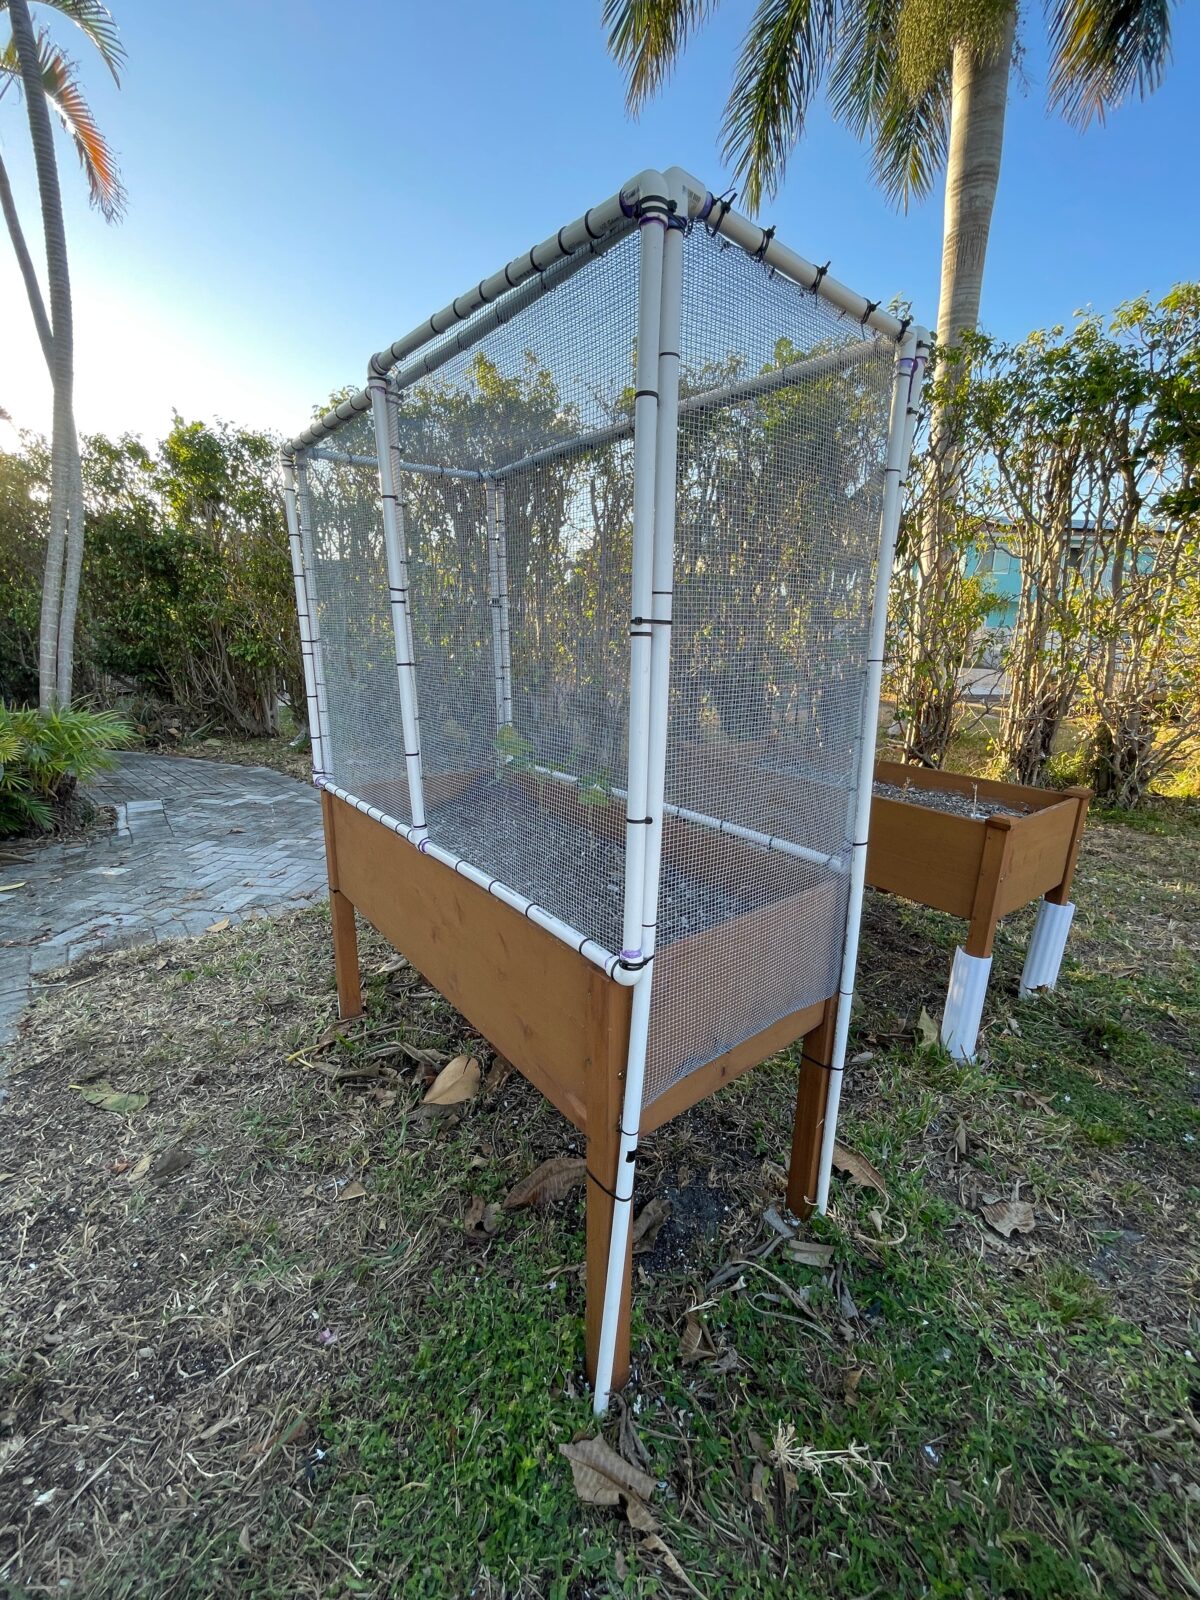
The Results
It is not pretty by any means – but it should work.
As you can see our grass and ficus bushes were struggling through the winter cold snaps, so I had some time left to wait before I got to planting.
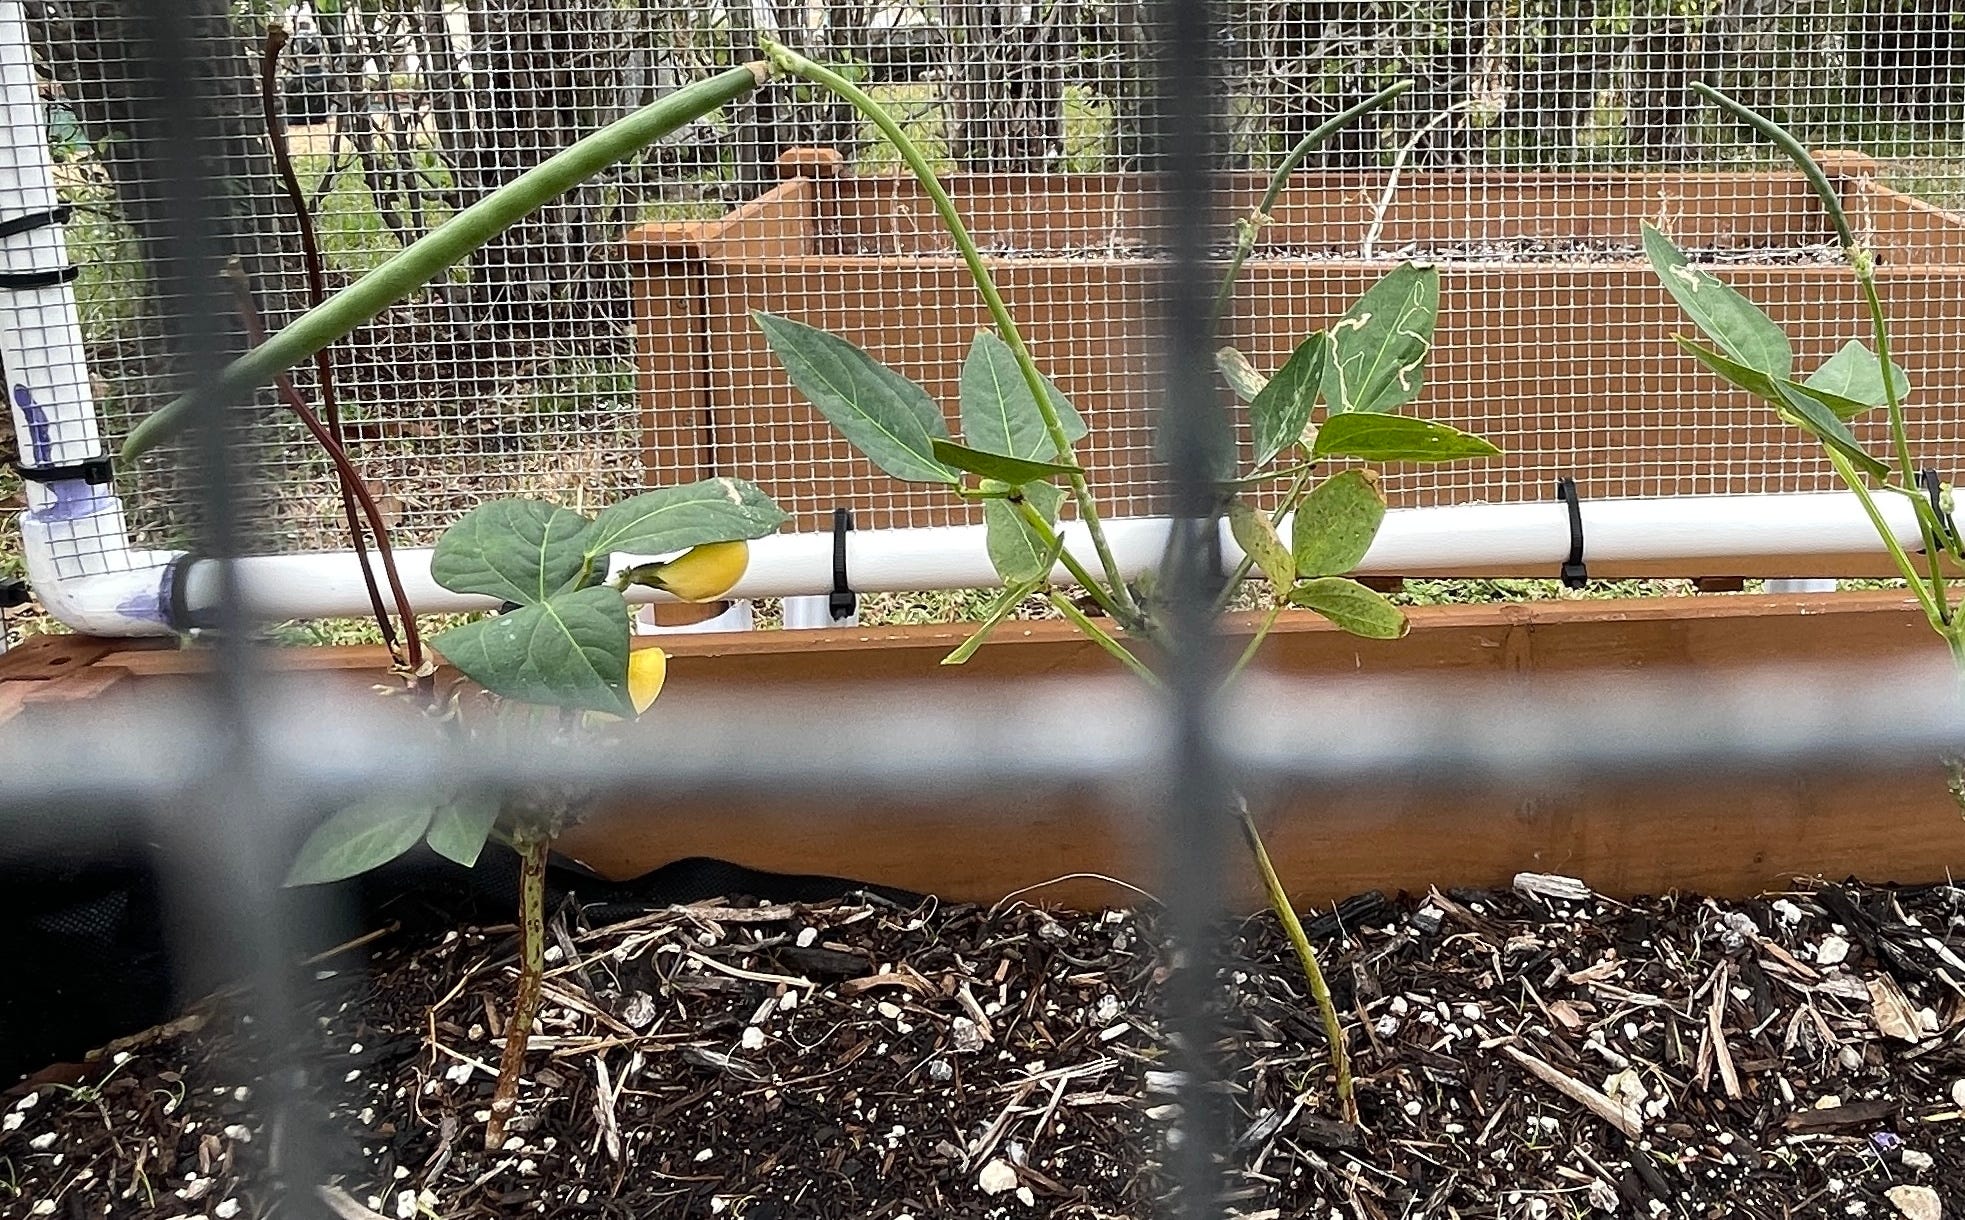
Luckily, three cowpea plants had survived the big iguana reckoning.
In all my research, the best thing you can do for soil is have roots in the ground, so I let them stay even though they were eaten down to nubs.
Within just three weeks in this enclosure, they had grown AND PRODUCED COWPEAS!!!
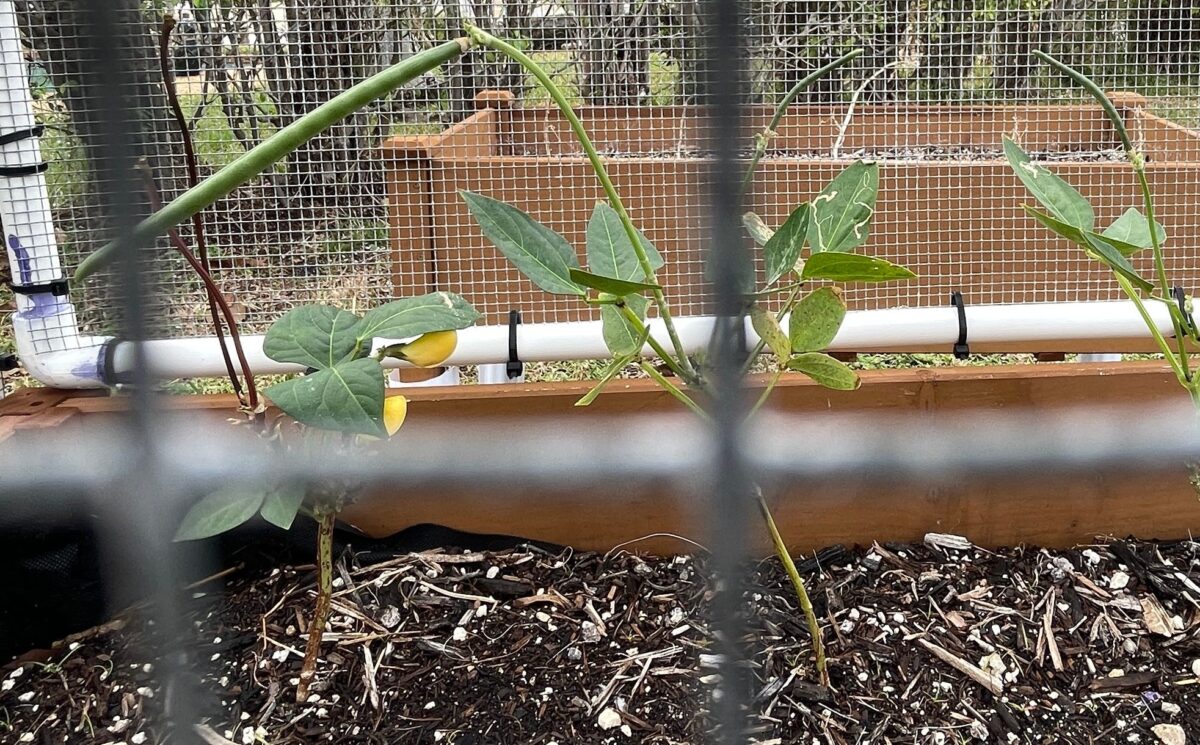
My plan was working!!
I texted this picture of my two little cowpea pods to my friends and family – I was so proud!!!
I figured I’d use this last bit of the cool season to plant cool weather plants, so I ordered three different lettuce varieties: Red Sails, Bronze Arrows, and Salad Bowl.
On to Another Learning Experience
In an effort to reduce, reuse, and recycle, I planted the seeds in a cardboard egg carton. While they did all sprout right away, they didn’t grow very much and ended up drying out.
I know the garden center has those seed starting kits with plastic covers on them but everything I read online said that the humidity dome was only to help the seeds germinate, and to remove it after. My seeds germinated immediately without it, so I didn’t think they needed it.
When I went to visit my brother, he and his wife had a seed starting tray FULL of strong seedlings. He had the humidity dome still on them at about 3-4 inches tall.
He said in his experience, keeping the humidity helped the seedlings get strong enough to transplant into the garden.
So I made a note of that for next season…
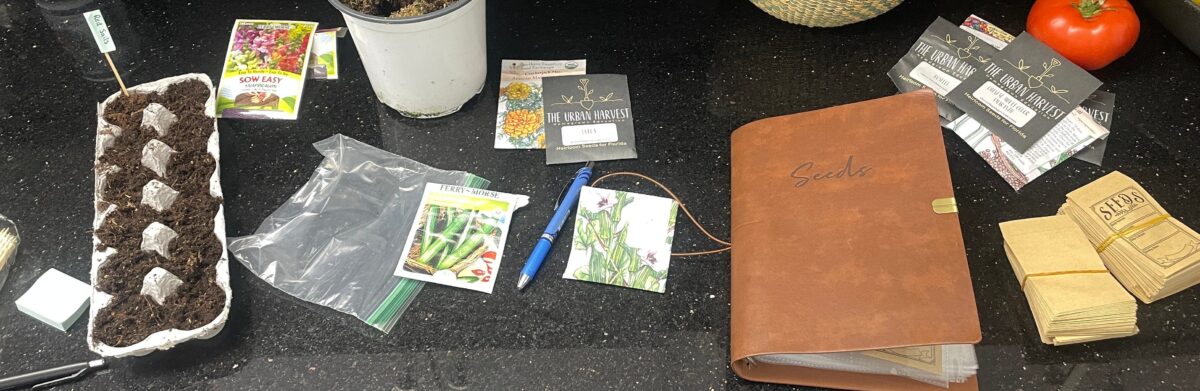
On a more positive note, my best friend gifted me this seed book! So I had a happy day organizing my growing collection of seeds, despite the failed winter seedlings.
Honestly, it’s funny to look back on these things.
You have to start somewhere!!!
Take Two, Part Two…
Spring planting season is in full swing.
I have learned A LOT from my mistakes the past couple years, a lot I haven’t even gotten into yet.
I have done so many more hours of research, and a lot of Youtube watching.
Next we’ll talk about what seeds and seedlings I planted for my garden zone and how they faired.
Something else happened this season that I’m very excited to share with you too – next time.